

Making your first crypto payment feels daunting, and for good reason. Unlike card swiping, where banks catch errors and chargebacks exist, crypto transactions are final the moment they confirm on the blockchain. Send to the wrong address, choose the wrong network, or fat-finger a single character, and your funds can be gone permanently with no support line to call.
But here is the good news: making a successful crypto payment is genuinely straightforward once you understand what to check. The steps are simple. The mistakes are predictable. And this guide walks you through every one of them: from setting up a wallet to sending your first payment and confirming it arrived, so your first time is not a costly learning experience.
Before You Start: What You Need
Making a crypto payment requires three things. Without all three, the transaction cannot happen:
A crypto wallet — This is where your cryptocurrency lives and from which you initiate payments. It can be a mobile app (Trust Wallet, MetaMask, Coinbase Wallet), a desktop application, or a hardware device. Your wallet holds your private keys, the cryptographic credentials that prove ownership and authorize transactions. Understanding virtual card issuance for new crypto users goes deeper into how wallets connect to spending tools.
Cryptocurrency with sufficient balance — You need not just enough to cover the payment amount, but also enough to pay the transaction fee (called a gas fee on Ethereum-based networks, or a network fee on Bitcoin). Running out of balance mid-transaction is a common beginner stumble.
The recipient’s wallet address or payment details — The person or merchant you are paying will give you their public wallet address (a long string of letters and numbers), a QR code that encodes that address, or a payment link. This is equivalent to a bank account number, unique to their wallet and required to route your payment correctly.
The golden rule before you begin: Crypto transactions are irreversible. Once confirmed on the blockchain, they cannot be recalled, disputed, or reversed. This is fundamentally different from credit cards and bank transfers. Every precaution in this guide exists because of this single fact.
Understanding Wallets and Addresses
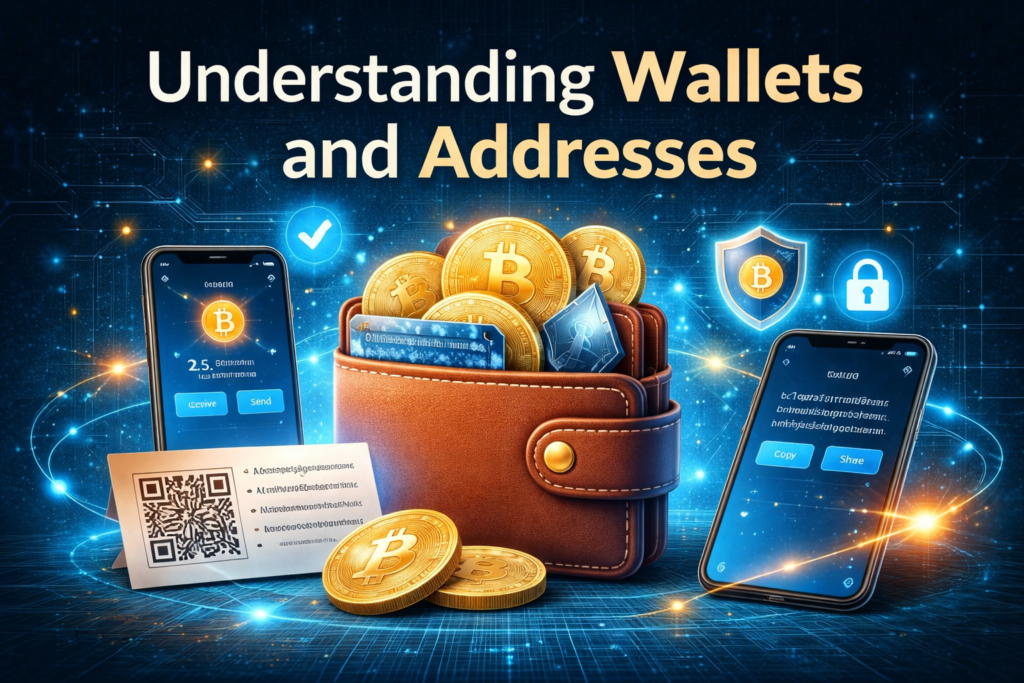
A wallet address is a long string of characters, typically 26 to 42 characters depending on the blockchain, that serves as your public identifier on the network. Think of it like an email address: you can share it freely, and anyone can send to it. Unlike an email address, a single typo in a wallet address can send funds permanently to the wrong destination.
Your wallet has two key components:
Public address — What you share with others to receive payments. Safe to share openly.
Private key (or seed phrase) — What proves you own the wallet and authorizes outgoing transactions. Never share this with anyone, under any circumstances. Anyone who has your private key or seed phrase has full access to your funds.
For how crypto payments work at a technical level, your wallet signs each transaction with your private key, proving to the network that you authorized it — without ever revealing the key itself.
Types of Wallets
| Wallet Type | Examples | Best For |
| Mobile hot wallet | Trust Wallet, MetaMask Mobile, Coinbase Wallet | Everyday payments, beginners |
| Desktop hot wallet | Exodus, MetaMask Browser Extension | Regular users are comfortable with computers |
| Hardware (cold) wallet | Ledger, Trezor | Large amounts, long-term storage |
| Exchange wallet | Binance, Coinbase, Kraken | Quick access, beginners, trading |
| Crypto card / virtual card | UPay | Spending crypto at any Visa/Mastercard terminal |
For your first payment, a mobile wallet or exchange wallet is the most beginner-friendly starting point. If you are only spending small amounts, keeping funds on a reputable exchange simplifies things. For larger amounts or long-term holding, a hardware wallet adds important security.
Choosing the Right Cryptocurrency to Pay With
Not every merchant accepts every cryptocurrency. Before making a payment, confirm which currencies the recipient accepts. Here is what matters for first-time payers:
Stablecoins (USDT, USDC) — Best for Beginners
If you are making your first crypto payment and want to avoid any complexity, stablecoins are the right choice. They are pegged 1:1 to the US dollar, which means the value you send is the value that arrives, with no volatility risk between sending and confirmation.
USDT (Tether) is the most widely accepted stablecoin globally. Most payment platforms, merchants, and wallets support it. If the person you are paying says, “send me crypto,” USDT is almost always accepted.
USDC (USD Coin) is similarly dollar-pegged, slightly more favored by regulated platforms, and equally practical for payments.
How to use crypto for everyday purchases covers stablecoin payments in more depth.
Bitcoin (BTC)
Bitcoin is the most universally recognized cryptocurrency and widely accepted for larger payments. Its main limitation for everyday small payments is a slower confirmation time (roughly 10 minutes per confirmation, with 6 confirmations for full security) and higher fees during congested periods. For first-time payments to friends, family, or on crypto payment platforms, Bitcoin works well.
Ethereum (ETH)
Ethereum is fast becoming a standard payment option, particularly for online services and DeFi-adjacent platforms. Its main variable is gas fees, which fluctuate based on network demand. During congested periods, sending a small ETH payment can cost more in fees than the payment itself — choose off-peak times or use a Layer 2 network (like Arbitrum or Optimism) for small amounts.
What to Ask the Recipient
Before sending anything, confirm:
- Which cryptocurrency do they accept?
- Which network should you use? (Critical — more on this below)
- Do they need a memo or a tag? (Required for some coins like XRP and XLM)
The Critical Concept: Networks
This is the most important concept for first-time senders and the one most frequently misunderstood. Getting the network wrong is the leading cause of lost funds in crypto payments.
The problem: The same cryptocurrency (like USDT) can exist on multiple blockchains simultaneously, Ethereum (ERC-20), Tron (TRC-20), Binance Smart Chain (BEP-20), and others. Each is a different “version” on a different network. If you send USDT on the TRC-20 network to an address that only supports ERC-20, the funds can be permanently lost.
Here are the most common networks you will encounter:
| Network Name | Also Called | Common For | Speed | Typical Fee |
| Ethereum | ERC-20 | ETH, USDT, USDC, most tokens | ~1–5 min | Variable (can be high) |
| Tron | TRC-20 | USDT (very popular) | Seconds | Very low (~$1) |
| BNB Smart Chain | BEP-20 | BNB, USDT, USDC | ~3 seconds | Very low |
| Bitcoin | BTC | Bitcoin only | ~10 min/confirmation | Variable |
| Solana | SOL | SOL, USDC | Seconds | Near zero |
| Polygon | MATIC | ETH, USDT on Layer 2 | Seconds | Near zero |
The rule: Always ask the recipient which network they need. Match your sending network exactly. If they say “send USDT on TRC-20,” select TRC-20 in your wallet — not ERC-20, not BEP-20. No exceptions.
Real consequence: Sending USDT on the wrong network is, in nearly all cases, permanently irreversible. Even exchanges with recovery services charge fees, and recovery is not guaranteed. A 30-second verification saves you from a potentially total loss.
Step-by-Step: Making Your First Crypto Payment
Follow these steps in order. Do not skip the test transaction step.
Step 1: Confirm Payment Details with the Recipient
Before opening your wallet, get the following confirmed in writing:
- Their exact wallet address (ask them to send it in text — do not read it out loud or type it manually)
- The cryptocurrency they accept (e.g., USDT, BTC, ETH)
- The network they want (e.g., TRC-20 for USDT)
- Whether a memo or tag is required (essential for XRP, XLM, and some exchange deposits)
- The exact amount expected
Step 2: Open Your Wallet and Check Your Balance
Open your wallet app or exchange account. Confirm you have:
- More than enough of the target cryptocurrency to cover the payment
- Enough native currency to pay network fees (e.g., ETH to pay gas fees on Ethereum, TRX to pay fees on Tron, BNB for BEP-20 transactions)
Running short on fee currency is one of the most common reasons first transactions get stuck.
Step 3: Send a Test Transaction First
This step is non-negotiable for your first payment, or any time you are sending to a new address.
Send a tiny amount — $1 to $5 worth — before sending the full amount. Wait for it to confirm on the blockchain and verify it arrived at the recipient’s wallet. Only then send the remainder.
This takes an extra few minutes and costs a small additional fee, but it is the only reliable way to confirm the address is correct, and the network matches before committing your full amount.
Step 4: Initiate the Full Payment
In your wallet, find the Send or Withdraw option. Then:
- Paste the recipient’s wallet address — do not type it manually
- Verify the pasted address against the original. Check the first 4 characters and last 4 characters against what the recipient sent you
- Select the correct network — confirm this matches what the recipient requested
- Enter the amount in cryptocurrency (not in fiat — confirm the crypto amount is correct)
- Add memo or tag if required
- Set or review the fee — most wallets suggest an appropriate fee. A higher fee = faster confirmation. Do not set fees too low, or your transaction may get stuck
- Review the full summary screen — address, network, amount, and fee — before confirming
Step 5: Confirm and Wait
After confirming, your transaction is broadcast to the network. You cannot cancel it at this point. You will receive a transaction hash (also called a TxID) — a unique identifier for your transaction that looks like a long string of letters and numbers. Save this.
Approximate confirmation times:
- Solana, Tron, BNB Chain: seconds to under a minute
- Ethereum: 1–5 minutes (longer during congestion)
- Bitcoin: 10–60 minutes for full confirmation (6 blocks)
Step 6: Confirm Receipt
Contact the recipient and ask them to confirm the funds arrived. Cross-check using a block explorer (see Section 9).
Using a Crypto Card Instead
If the above process sounds like more complexity than you want to manage for everyday spending, a crypto debit card is a much simpler alternative, and it works anywhere that accepts Visa or Mastercard.
A crypto card like UPay converts your crypto to local fiat currency at the point of sale. You swipe or tap like any normal card. The merchant sees a standard payment. You never have to copy a wallet address, choose a network, or worry about gas fees.
This approach eliminates essentially every complexity and risk described in the previous sections, while still letting you spend from your crypto balance.
How it works:
- Load your crypto card with USDT, BTC, ETH, or other supported currencies
- Use the physical or virtual card at any merchant accepting Visa/Mastercard
- The card automatically converts your crypto to local fiat at the point of sale
- You receive a standard payment receipt
The UPay card is accepted at over 55 million merchants globally, works with Apple Pay and Google Pay, and supports multiple currencies. For anyone who wants to spend crypto without the technical friction of wallet-to-wallet payments, getting your first crypto card is the practical first step.
Fees Explained: What You Will Actually Pay
Transaction fees are one of the most misunderstood aspects of crypto payments for beginners. Here is a clear breakdown:
Network Fees (Gas Fees)
Every crypto transaction pays a small fee to the validators or miners who process and confirm it on the blockchain. This fee does not go to any company it goes to the network participants who keep the blockchain running.
Key things to know:
- Fees are paid in the native currency of the network, not in the token you are sending. Sending USDT on Ethereum? You pay the fee in ETH, not in USDT. If you have no ETH in your wallet, the transaction will fail even if you have plenty of USDT.
- Fees fluctuate with network congestion. Ethereum fees can be $1 during quiet periods or $50+ during peak activity. Tron and Solana fees are typically fractions of a cent.
- Setting your fee too low can cause your transaction to sit unconfirmed for hours. Use your wallet’s “recommended” or “fast” fee setting.
Platform Fees
Exchanges and wallet providers sometimes add their own small fee on top of the network fee. Review the full fee breakdown shown before you confirm any transaction.
Crypto Card Fees
If you are using a crypto debit card, fees typically come in the form of a conversion fee (usually 0.5–2%) applied when your crypto is converted to fiat. There are usually no per-transaction network fees because the card provider handles the blockchain transaction on your behalf. Learn more about how crypto card fees compare before choosing a card.
The Five Mistakes That Cost Beginners Their Money
Every one of these mistakes is preventable with a single check. Memorize them before you send anything.
Mistake 1: Wrong Network
What happens: You send USDT on Tron, but the recipient’s exchange only supports ERC-20 (Ethereum). The funds arrive at the address but cannot be credited because the exchange doesn’t track that network’s transactions.
Prevention: Confirm the network with the recipient before sending. Match it exactly in your wallet’s network selector.
Recovery: Often impossible. Some exchanges offer recovery services for substantial amounts, but they charge fees, and success is not guaranteed.
Mistake 2: Wrong or Mistyped Address
What happens: A single wrong character sends your funds to someone else’s wallet or to an address that doesn’t exist. Either way, your funds are gone.
Prevention: Always paste, never type wallet addresses. After pasting, manually verify the first 4 and last 4 characters against the original. Use QR codes where available.
The clipboard malware risk: Malicious software can silently replace a wallet address in your clipboard with the attacker’s address the moment you paste. This is real and documented. Always verify the pasted address visually. Never rely on copy-paste alone.
Mistake 3: Skipping the Test Transaction
What happens: You send $2,000 to a new address. The address was mistyped, or the network was wrong. The full amount is lost.
Prevention: Always send a $1–5 test amount first. Wait for confirmation. Verify receipt. Then send the full amount. This takes 5 minutes and costs cents.
Mistake 4: Insufficient Fee Currency
What happens: You want to send USDT on Ethereum, but your ETH balance is $0. The transaction fails; sometimes, after you think it has been submitted, you waste time troubleshooting.
Prevention: Before sending any token on a network, confirm you hold a small amount of that network’s native currency to cover fees (ETH for Ethereum, TRX for Tron, BNB for BNB Chain, SOL for Solana).
Mistake 5: Missing Memo or Tag
What happens: You send XRP or XLM to an exchange address without including the required destination tag or memo. The exchange cannot identify which account the funds belong to. Recovery is possible but time-consuming.
Prevention: When depositing to centralized exchanges (Binance, Kraken, etc.), always check if a memo, tag, or payment ID is required alongside the wallet address. For XRP, XLM, and similar coins, the memo is mandatory — not optional.
How to Verify Your Payment Went Through
After sending, you can independently verify your transaction using a block explorer — a public website that shows every transaction ever recorded on a blockchain.
Common block explorers by network:
- Bitcoin: blockchain.com or blockstream.info
- Ethereum / ERC-20: etherscan.io
- Tron / TRC-20: tronscan.org
- BNB Chain / BEP-20: bscscan.com
- Solana: solscan.io
Paste your transaction hash (TxID) into the search bar on the relevant explorer. You will see:
- Status: Pending, Confirmed, or Failed
- From address: Your wallet address
- To address: The recipient’s address (verify this matches)
- Amount and token: What was sent
- Network: Which blockchain processed it
- Timestamp: When it was confirmed
A confirmed transaction with the correct recipient address means the payment was successful. Share the block explorer link with your recipient as proof of payment if needed.
Setting Up Recurring Crypto Payments
Once you are comfortable with one-off payments, you may want to automate regular transactions for subscriptions, loan repayments, payroll contributions, or scheduled transfers.
Setting up recurring crypto payments is supported by several platforms and has specific considerations worth understanding:
Stablecoins work best for recurring payments. If you are paying a fixed fiat amount (say, $50/month for a subscription), paying in USDT or USDC means the recipient always receives the exact value you intend. Recurring Bitcoin payments expose both parties to price volatility; the dollar value of each payment could vary significantly month to month.
Most wallets do not automate recurring transactions natively. You typically need a platform or service that offers subscription or scheduling features. Some crypto payment processors (like BitPay or Coinbase Commerce) offer this for businesses receiving payments.
Monitor each scheduled payment. Unlike traditional direct debits backed by bank guarantees, crypto payment automation depends on your balance and network conditions. If your wallet runs low or fees spike, payments can fail without notification unless you set alerts.
Frequently Asked Questions
Can I reverse a crypto payment if I make a mistake?
No. Blockchain transactions are final once confirmed. There is no equivalent to a chargeback, recall, or bank dispute. This is why verifying all details before confirming is so important. If you catch a mistake before the transaction is confirmed (while it’s still “pending”), some wallets allow you to replace or cancel the transaction by resubmitting with a higher fee — but this is not always possible and depends on network conditions.
How long does a crypto payment take to arrive?
Stablecoin transactions on Tron or Solana typically arrive in seconds. Ethereum transactions take 1–5 minutes under normal conditions, longer during congestion. Bitcoin payments take roughly 10 minutes per confirmation, with 6 confirmations (about one hour) considered fully settled for large amounts. For smaller amounts, many recipients accept 1–2 confirmations which arrive in 10–20 minutes.
What if my transaction is stuck or pending?
A transaction stuck in “pending” has been broadcast to the network but not yet picked up by a miner or validator — usually because the fee you paid is too low. On networks like Ethereum, you can sometimes “speed up” a pending transaction by resubmitting with a higher fee. On Bitcoin, some wallets support a process called Replace By Fee (RBF). If you cannot accelerate it, waiting is usually the only option — eventually the transaction will either confirm or expire and return to your wallet.
What is the safest way to share my wallet address with someone?
Copy and paste your address and send it through a secure message. Using a QR code shown directly from your wallet app is even better — it eliminates typing errors entirely. Never send your address through a channel where it could be intercepted and replaced by an attacker.